My grandmother turned 91 in April. She is the last surviving of her twelve siblings and her whole family loved to play games. In particular, they loved to play Scrabble. I've made Grandma different Scrabble gifts before, but wanted to do something extra special this year. I came across this quilt idea and, although I've never quilted before, decided to make something similar. I semi-followed the instructions found here, but had to adapt a bit to make it look like a Scrabble board and to get it the size I wanted it.
I started planning this back in mid-January. I used a spreadsheet to lay out the names I wanted to include: Grandma's maiden name and the names of her parents and twelve siblings. I drew up a scrabble board on the spreadsheet and colorized the squares so I would know which squares were which. I knew I wanted to have "LOWDER" span the center square, so I started from there. It took awhile, but I eventually got them all on.

Next, I counted how many of each color square I would need for both the front and back of the quilt and purchased the fabric. I started out thinking to make 8x8 squares. I thought I'd calculated the right amount but once I got cutting, I realized I had underestimated. I used camel colored flannel for the lettered squares, and then red, dark blue, light blue, and pink flannel for the colored tiles and tan flannel for the blank squares. After two trips to buy fabric and batting, I finally began the process of cutting the squares.


While not quite as tedious as cutting all the squares, this was still extremely mind numbing.


After finishing the Xes, I realized that my squares were going to be too big, so I cut them down by an inch. This resulted in a large scrap pile that was very soft!

Once I had the squares sewn and cut to size, I added up the number of each letter I would need and added it to the spreadsheet, making sure to note which letters needed to be painted on which color backing. Remember that the back of the quilt is a blank Scrabble board! This was more challenging than expected, since apparently I have addition issues...

I used fabric paint and a letter stencil I found at JoAnn's to paint on the letters.

I couldn't find just the right Scrabble font, so I had to free hand some of the areas that were left open on the stencil, but I was pleased with the final product.

After letting the paint dry for two days, I began the process of painting on the letter values. The stencil kit I'd purchased had the 2, 3 and 4, but no 1, so my husband cut one out for me! Again using the spreadsheet as a guide, I added the number values to each letter.

Next, I placed the quilt squares in the correct order and did a rough lay out of the quilt.
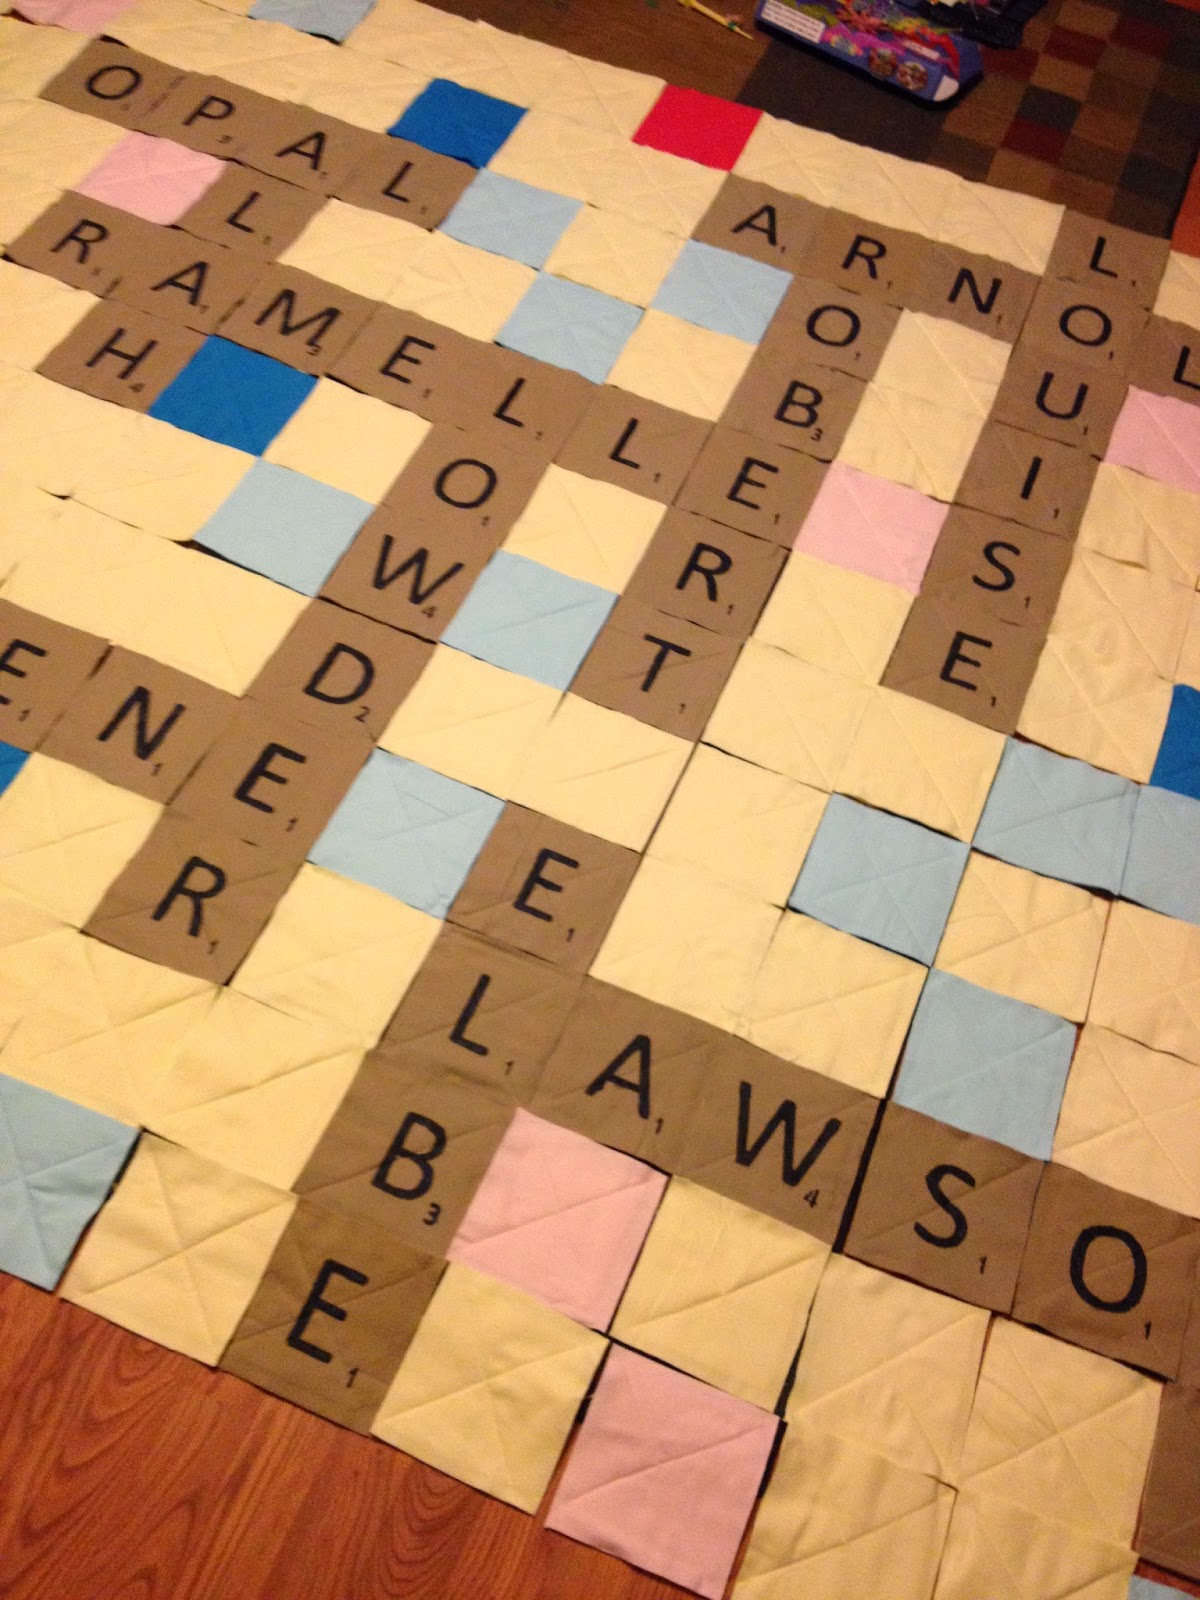
I stacked each row into a pile and labeled the row number, so I could figure out which was which when I was ready to sew the rows together.

At this point I realized that by cutting the squares down, I had eliminated the ability to have a 3/4 inch seam. Oops. I ended up making 1/2 inch-ish seams. I stitched each square in the row together, making sure to have the letters on the correct side! Then I pinned the rows together to make sure that my seams for each tile were lined up, then I sewed the rows together.

As the quilt got larger, it was more and more challenging to get the bulk through the machine.

When everything was stitched together, I began to cut the seams, making a fringe about 1/4 inch deep. The fringing was a messy job. Little pieces of thread and flannel were everywhere by the time I was done. Since my grandma has dementia, I wanted to put a quilt label on so she would know who made the quilt and why. I looked at the ones that were available at the store, but wasn't impressed. I decided I'd try to make a simple one using some scrap material I had on hand and a fabric marker. I used heat and bond to adhere the patch onto the quilt.

Once that was done, I ran the quilt through the wash to get rid of some of the threads and to give the quilt a basic "rag" look. My mom and I then used a lint remover to take the lint and threads off of the squares before I wrapped up the quilt.
Here's the finished product...

and back...

Unfortunately, we weren't able to make the trip to Michigan for her birthday, but the quilt was delivered by my parents and my aunt. Here is Grandma with her new quilt.
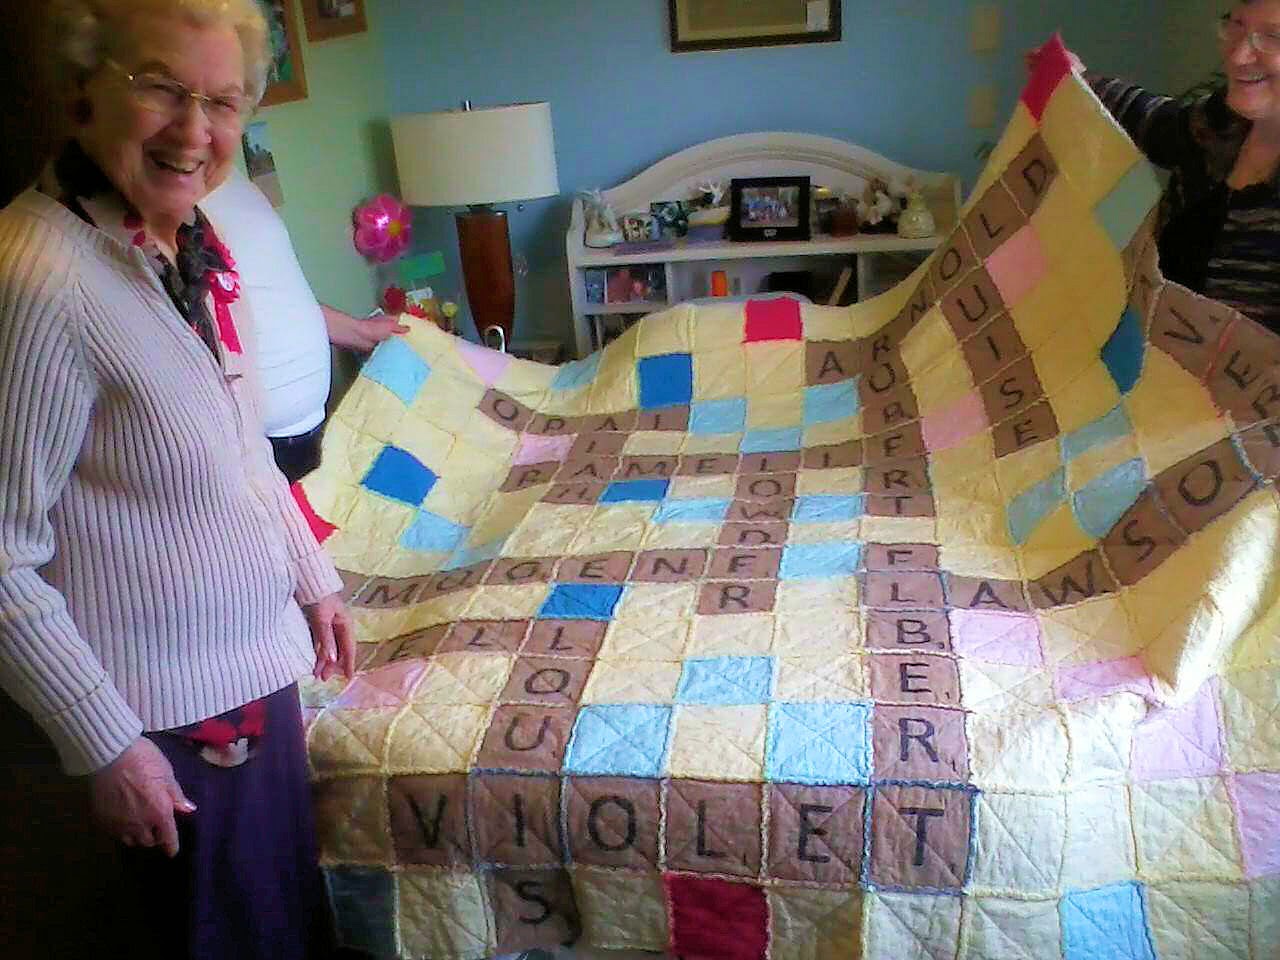
My parents reported back that she was THRILLED with it and that it was helping her reminisce about her family and her childhood.

MISSION ACCOMPLISHED!! And - score - it fit on her bed almost perfectly!
I started planning this back in mid-January. I used a spreadsheet to lay out the names I wanted to include: Grandma's maiden name and the names of her parents and twelve siblings. I drew up a scrabble board on the spreadsheet and colorized the squares so I would know which squares were which. I knew I wanted to have "LOWDER" span the center square, so I started from there. It took awhile, but I eventually got them all on.
Next, I counted how many of each color square I would need for both the front and back of the quilt and purchased the fabric. I started out thinking to make 8x8 squares. I thought I'd calculated the right amount but once I got cutting, I realized I had underestimated. I used camel colored flannel for the lettered squares, and then red, dark blue, light blue, and pink flannel for the colored tiles and tan flannel for the blank squares. After two trips to buy fabric and batting, I finally began the process of cutting the squares.
Once the colored squares were cut, I cut a duplicate amount of batting, making each square 2" less than the colored squares. I created "sandwich" squares by putting the together the correct colored squares with a batting square in the center. The spreadsheet diagram came in very handy here, when I was trying to match the back color and the front color! Once I had the sandwiches made, I sewed an "X" across the center of each sandwich.
While not quite as tedious as cutting all the squares, this was still extremely mind numbing.
After finishing the Xes, I realized that my squares were going to be too big, so I cut them down by an inch. This resulted in a large scrap pile that was very soft!
Once I had the squares sewn and cut to size, I added up the number of each letter I would need and added it to the spreadsheet, making sure to note which letters needed to be painted on which color backing. Remember that the back of the quilt is a blank Scrabble board! This was more challenging than expected, since apparently I have addition issues...
I used fabric paint and a letter stencil I found at JoAnn's to paint on the letters.
I couldn't find just the right Scrabble font, so I had to free hand some of the areas that were left open on the stencil, but I was pleased with the final product.
After letting the paint dry for two days, I began the process of painting on the letter values. The stencil kit I'd purchased had the 2, 3 and 4, but no 1, so my husband cut one out for me! Again using the spreadsheet as a guide, I added the number values to each letter.
Next, I placed the quilt squares in the correct order and did a rough lay out of the quilt.
I stacked each row into a pile and labeled the row number, so I could figure out which was which when I was ready to sew the rows together.
At this point I realized that by cutting the squares down, I had eliminated the ability to have a 3/4 inch seam. Oops. I ended up making 1/2 inch-ish seams. I stitched each square in the row together, making sure to have the letters on the correct side! Then I pinned the rows together to make sure that my seams for each tile were lined up, then I sewed the rows together.
As the quilt got larger, it was more and more challenging to get the bulk through the machine.
When everything was stitched together, I began to cut the seams, making a fringe about 1/4 inch deep. The fringing was a messy job. Little pieces of thread and flannel were everywhere by the time I was done. Since my grandma has dementia, I wanted to put a quilt label on so she would know who made the quilt and why. I looked at the ones that were available at the store, but wasn't impressed. I decided I'd try to make a simple one using some scrap material I had on hand and a fabric marker. I used heat and bond to adhere the patch onto the quilt.
Once that was done, I ran the quilt through the wash to get rid of some of the threads and to give the quilt a basic "rag" look. My mom and I then used a lint remover to take the lint and threads off of the squares before I wrapped up the quilt.
Here's the finished product...
and back...
Unfortunately, we weren't able to make the trip to Michigan for her birthday, but the quilt was delivered by my parents and my aunt. Here is Grandma with her new quilt.
My parents reported back that she was THRILLED with it and that it was helping her reminisce about her family and her childhood.
MISSION ACCOMPLISHED!! And - score - it fit on her bed almost perfectly!


