Showing posts with label ebabe. Show all posts

Lithuania is a country in Europe's Baltic States about the size of West Virginia.   It has 67 athletes competing and has won 1 silver and 2 bronze medals at the 2016 Olympics thus far. 

On the menu for dinner was Lithuanian kugelis and Napoleona tarte for dessert.


The Verdict:
Ebabe actually liked the kugelis and kept commenting about how good it was!  The rest of us thought it was okay, but a little bland.  Our convection oven browned the potatoes much faster than the regular oven would have, but the potatoes in the center of the dish weren't cooked completely. We solved that problem fairly easily.  The recipe mentions serving kugelis with sour cream and that did give it an additional boost.

The Napoleona tart was not as difficult to make as I thought it might be.  It was very, very rich.  It was good, but be sure to serve it in fairly small pieces!   

Oh, and Ebabe decided to fold napkins for us - boats, which seems fitting since two of the medals Lithuania has won in Rio were for rowing. 


Lithuanian Kugelis (recipe from Full Fork Ahead, adapted from Serious Eats)
She wrote the recipe up beautifully and there are great step-by-step photos, so check it out there!


Lithuanian Napoleona Tarte (original recipe from VilNews)
The important thing to note about this is that you need to start it the night before you want to prepare it!

Torte Ingredients:
4 1/2 cups flour
dash of salt
3 eggs
4 1/2 sticks unsalted butter (we used Earth Balance sticks to be dairy-free)
water

Put 4 1/2 cups of flour and a dash of salt in a mixing bowl.  Cut in the 4 1/2 sticks unsalted butter.

In a separate bowl mix the eggs with 4 1/2 TBSP of water, then add to the flour mixture. Mix well. Wrap in plastic wrap or store in sealed container and place in refrigerator for 5-7 hours or overnight.


The next day, divide dough into 8 to 10 pieces.


Roll out each piece into very thin 10 inch rectangles.  (other recipes suggest circles, which would be easier in general, so consider that!)
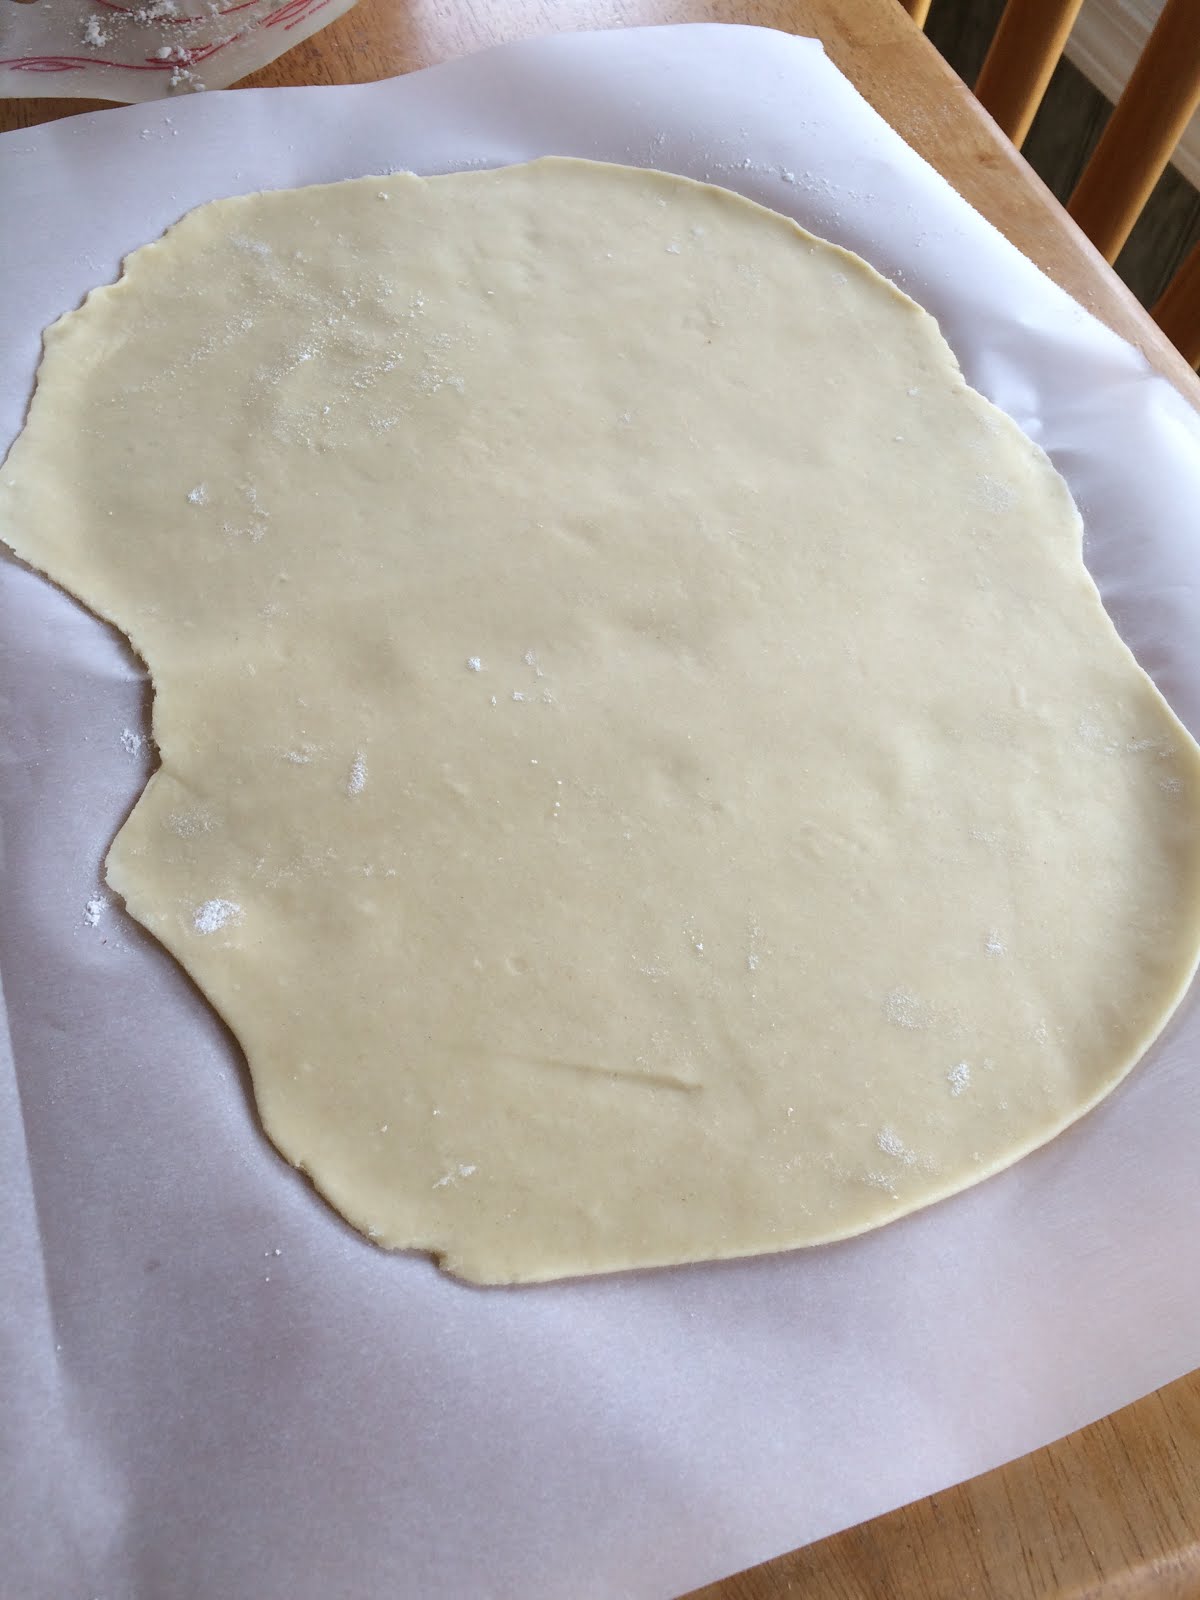


Bake at 375F - 400F for 20 minutes on cookie sheet until light golden brown.  In our convection oven, I baked the at 375F for 14 minutes and they were done.  Remove from oven and cool completely.


Cream Ingredients:
3/4 cup flour
1 1/4 cup sugar
2 cups milk (we used almond milk to make it dairy-free)
2 eggs
2 boxes of sweet whipped butter (I couldn't find this so we made our own using almond milk, Earth Balance spread, and about 1/2 cup of sugar)
4 egg yolks
1 TBSP orange extract
1 TBSP lemon extract
1 TBSP vanilla extract
1 large lemon (for zest and juice)
3/4 - 1 1/2 oz whiskey (to your taste)

Cream -
Mix flour, 1/2 cup sugar and milk together and cook on low-medium heat until it gets a little thick.
Add 2 eggs, mix well and remove from heat.  Allow to sit until well cooled.

Then whip the sweet whipped butter, 3/4 C. sugar, and egg yolks together.  Once blended, add to the flour and milk mixture and mix well.  Add extracts, lemon zest, juice from the lemon, and whiskey.  Mix well.

Spread thinly between layers leaving some for top and sides.


It's OLYMPIC time again!  Once again, I am planning on cooking a meal from a different country each night during the Olympics.  We started this as a way to learn more about countries other than the United States and to expand our palette.  Please keep in mind that I culled all the recipes together, illiciting ideas from Facebook friends and Pinterest boards.  I am the complete opposite of a professional chef.  In fact, I do not like to cook at all.  I guess that's another reason I took on this task.  It forces me to cook things I would otherwise never attempt.

It's the first full day of the Sochi Olympics and my intent was to cook our Russian food tonight.  Alas, in between grocery shopping for our two weeks of ethnic cooking, picking up and then sorting 130+ boxes of Girl Scout cookies for delivery, shoveling another 4 inches of snow from the driveway, and helping kids complete their generic Valentines (I just don't have the time or energy to make homemade this year!), I neglected to make the dough in time.  When I finally got around to getting the ingredients out, I realized that the dough would need to rise for about 2 hours and then set for another 30 minutes or so before I could even cook.  So, we changed gears and decided it would make sense to begin our Olympic cooking with Greece, instead.

For dinner we had Kolokythokeftedes and Greek Marinated Chicken.


We made the marinade for the chicken first.  The girls wanted to help with the process and worked on adding the ingredients while I chopped herbs.  It was fine, but after one measurement error (TBSP vs tsp), I decided they needed a little more supervision, thus making the process a little longer.


While the chicken was marinating, Boo and I whipped up a batch of zucchini balls or
Kolokythokeftedes. The recipes for both dishes are listed below.

Verdict:  The kids really liked the flavor of the chicken and seemed to enjoy the Kolokythokeftedes, too.  Ebabe wasn't overly enthusiastic about the fried outside part, but gobbled up the insides.  Guess this might be a good way to get them to eat their vegetables!

GREEK CHICKEN MARINADE (recipe from Budget Bytes)
Ingredients
  • 1 cup plain yogurt
  • 2 Tbsp olive oil
  • 4 cloves garlic, minced
  • ½ Tbsp dried oregano
  • 1 medium lemon
  • ½ tsp salt
  • freshly cracked pepper
  • ¼ bunch fresh parsley
  • 3½ to 4 lbs chicken pieces
To make the marinade, combine the yogurt, olive oil, minced garlic, oregano, salt, and some freshly cracked pepper in a bowl. Use a fine holed cheese grater or a zester to scrape the thin layer of yellow zest from the lemon skin into the bowl. Also add the juice from half of the lemon (about 1-2 Tbsp). Stir until the ingredients are well combined. Roughly chop a big handful, or about ¼ bunch, of parsley and stir it into the marinade.

Add the chicken pieces and marinade to a gallon sized zip top bag. Remove as much air as possible, close the bag tightly, and massage the bag to mix the contents and make sure the chicken is well coated. Refrigerate the bag for 30 minutes.

After marinating for 30 minutes, cook the chicken on a grill.


KOLOKYTHOKEFTEDES  (original recipe from Closet Cooking)

Ingredients
  • 2 zucchinis, grated and squeezed to remove as much liquid as you can
  • 1/4 cup of crumbled feta
  • 1 clove garlic, chopped
  • 2 green onions, sliced
  • a few table spoons of freshly chopped dill and parsley
  • 1 egg, lightly beaten
  • salt and pepper to taste
  • approximately 1/2 cup flour
  • 2/3 cup Panko breadcrumbs
  • oil for frying
Mix the zucchini, feta, garlic, green onion, herbs and egg.  Lightly season with salt and pepper.


Mix in enough flour and breadcrumbs (we used about 2/3 cup of Panko bread crumbs and 1/2 cup of flour) that you can work with the mixture to form balls.  Form the mixture into balls and dust in flour.


Fry in oil until golden brown.


The remove from pan to cool and serve warm!


We are headed to Disney again pretty soon.  Even though my girls are getting older, they keep reminding me that they like to have some fun Disney-esque clothes to wear.  We decided to make family t-shirts using freezer paper stencils.  First we downloaded clip art of our favorite characters.  Coloring pages seem to work best since they have thicker lines.
 

We printed out the image, put a piece of freezer paper (shiny side down) over the top and traced the image.  My daughters were able to trace their own characters.  

Then you use an exacto knife and cut out the spaces between the lines.  I do not have the patience or the steady hand for this, but I am married to someone who is!  I wish I'd been able to get a picture of this but he did it while I was putting the kiddos to bed and I didn't get a shot.  Sorry.

Be sure to wash the shirt you are going to use, but do NOT use fabric softener.  The paint will not adhere well if you use fabric softener before you apply the paint.


Next, place the outline on the t-shirt, shiny side down.  Move it to where you want it.  Iron it on to the t-shirt using the low heat setting.  If it isn't sticking after a few swipes, increase the heat slightly.  Make sure to iron the edges very carefully.  If you finish ironing it on and it isn't exactly where you want it to be, carefully peal it off, reposition it, and iron it down again.


Next, use your fabric paint (I used Tulip brand soft paint) and cover your stencil with paint.  Allow it to dry for 4-6 hours before removing the freezer paper.  If you want to do a second coat of paint, let it dry for about 2 hours, apply the second coat and allow to completely dry.


Once you've removed the freezer paper, you can accessorize any way you'd like.  I thought about adding different colors for the collar, tongues, bows, etc., but decided that I really liked them without any additional colors. Once you have completed your fabric painting, be sure to check the paint to see if it needs to be heat set.  Tulip paint does not require heat setting, but suggest you do not wash the shirt for 72 hours. 

Here are our finished shirts.


If you recall, we have made t-shirts using contact paper stencils before.  Since two of the girls had outgrown their shirts, we made a few using the freezer paper technique.  I think the freezer paper version was a bit easier for the more intricate designs, but it was just as easy to do the entire Mickey head with the contact paper.

In this version, we used a toy truck tire to create a bit of texture.  We did the last swipe with a silver glitter color to add a little more dimension.  Ebabe created this one.


For Boo's shirt, I attempted to use a bleach pen to do something a little different, but apparently bleach pens stop working with age.  Who knew?!  No matter what I tried (and this included using liquid bleach on a sponge), the shirt would not bleach.  So, I rewashed it to get any residue out and used fabric paint.  Boo used a dollar store squish ball to create the textured pattern she liked.  She used a combination of white and glitter paints to get the color she liked. 
 

The freezer paper stencil was fairly easy and not too time consuming.  The kids are thrilled with their character shirts and that's what really matters!

We were inspired by this post by The Handmade Home.
In preschool last week, Ebabe made a festive turkey using an apple, toothpicks, mini-marshmallows and cereal.  She apparently kept eating the supplies as they were making them.  Her teacher told me she didn't expect that Ebabe's turkey would survive, uneaten, through dinner time. 


She was right.


It didn't even make through the 5 minute car ride home! 

This post has been linked to the You Capture challenge:  I Ate That hosted by Beth at  I Should Be Folding Laundry.
There were two themes for this week's You Capture - Halloween and Silence.  Since silence is just not in the vocabulary of my household, you're going to get an overdose of Halloween.

We usually have a family theme but this year, everyone decided to go with their own ideas.  From youngest to oldest...

Here's Strawberry Shortcake.  Yes.  She has wings.  We were at the dollar store the day before and she found some pretty cool wings that were "perfect" for her costume.  Why not?!  So she became the Strawberry Shortcake fairy.


This was taken during the preschool costume parade.  She's wanted to be Strawberry Shortcake since last Spring.  We managed to put together the costume using our existing wardrobe of hand-me-downs and a borrowed hat.

Sitting with her jack-o-lantern.


Ebabe's jack-o-lantern all lit up.  She drew the face by herself and helped me cut it out, although she wasn't overly fond of getting her hands too gooey at first.

Bug decided in the Spring that she wanted to be Jessie from Toy Story.  About a month ago, when I was getting ready for a Children's clothing resale, she picked up the costume her sister had worn a few years ago and decided she just had to be a dragonfly.


Here's the back of the costume.  Much nicer than my attempt at face painting...

Here she is.  A dragonfly in flight!


Here's Bug's jack-o-lantern.  She designed it and cut most of it herself this year.

 Boo has just finished reading the Harry Potter series.  She and her friends play Harry Potter at recess.  It was only natural that she would want to be Hermione Granger, a character from Harry Potter for Halloween.


We were lucky enough to borrow the robe and scarf from some friends and pieced the rest of the outfit together from Goodwill purchases and broken tree limbs.


 "Leviosa!"

 Of course her jack-o-lantern had to be Harry Potter themed as well.  I mean, it isn't as if the 7th movie is coming out in a little under 14 days or anything...  Chip did most of the work but Boo did help a little bit.


This is my pumpkin.  I made it using Chip's drill.  It was very therapeutic drilling multiple holes into the pumpkin.  I would totally recommend trying it!  It turned out pretty fun too, in a disco-ball sort of way.


And finally, we get together every Halloween (just for a few minutes) with some close friends of ours.  This year, they headed over to trick-or-treat at our house and I managed to capture their costumes and personalities all together... not an easy feat!

I hope you had an enjoyable Halloween!  To check out other Halloween shots and maybe some silence, check out I Should Be Folding Laundry.
This weeks You Capture assignment was orange - my favorite color and perfect for my favorite time of year!

Last weekend we went hiking over at Starved Rock and Matthiessen State Parks (along with what seemed to be half of the Chicagoland area). 


Orange, yellow, red and brown leaves were in abundance!  It was marvelous.  The only thing that would have made the views better was if the waterfalls had actually had water flowing.  Maybe next year...

On Sunday, we headed over to Goebbert's Pumpkin Patch in Hampshire, IL.  I knew I should have changed the batteries in the camera before we left but I forgot.  Therefore, this is the only shot I got before the batteries ran out.


This is the pumpkin eating dinosaur.  He drew huge crowds of children and young at heart.  Bug told him he needed to brush his teeth and he thanked her.  Too fun!
Here's a shot taken with Chip's cell phone, because we can't not have a pumpkin patch picture...

Finally, to end the weekend, we headed over to celebrate a friend of Ebabe's birthday.  They have much larger trees at their house and a nice pile of leaves to play in!


For more orange images, check out Beth's You Capture challenge.
No excuses.  I took the pictures but kept putting off blogging about them.  Since the pictures were already on the computer, just waiting for me to do something with them, I figured I'd play catch up and get them posted.  Better late than never, right?

YOU CAPTURE - FACES
Almost two weeks ago, the You Capture topic was Faces.


 It was "nerd day" at CYT rehearsal. 
She found some Gaucho glasses and we removed the nose so she'd have just frames. 

 Ebabe couldn't be left out either.
This is my sick puppy... well, not so much a puppy (he's 12 1/2) anymore.  At the time of this photo, he had a nasty cough and just wasn't himself.  I am happy to report that he is feeling better and continues to recover from his cough.

YOU CAPTURE  - ANIMALS
Yep, the picture of Mozie would have been appropriate for the Animals You Capture challenge but since he was still not feeling himself, I chose to let him rest. 


Most of the animals we have around the house are of the plush variety.